![]()
![]()
![]()
![]()
![]()
|
|
|
| The Waves are great synthesizers, but they have a severe problem: the keyboard. Practically every owner of a Wave should know the phenomenon of stuck keys, double attacks, and that the Wave looks exactly as its name suggests when viewed from the front, like that:
All of these problems stem from the keyboard's construction. Inside, little rubber pieces are used as attenuators. Unfortunately, they loose their form over time (partially causing the wave line) and, what's worse, they disintegrate. This leads to:
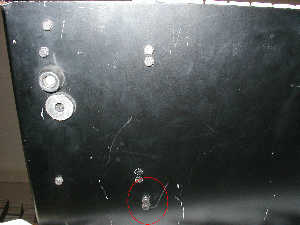
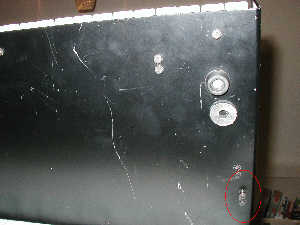
Recently, a very interesting solution to this problem was created by Virtual Music in Vienna: the Keyboard Upgrade Kit. Owning some Waves, I just had to have that... here's my experience with it. PreparationsMy first impression, when the packet came, was: "What? That's all?"... but the small package really does what it promises. The content is perfectly tuned to the Wave's keyboard and - to come to the point - improves the Wave considerably. The manual is rather brief, but sufficient. I read it twice, then I had a rather good idea how it should work. Okay, here we go... time's running... 1. RemovalThis part is probably the easiest... if you know how the keyboard is attached to the Wave. This is done with 4 screws. Viewed from below, they are here:
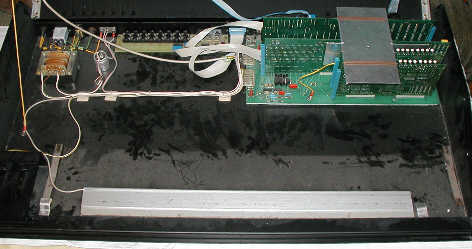
Once the screws are removed, you can pull the keyboard out of the Wave. This
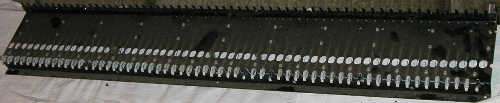
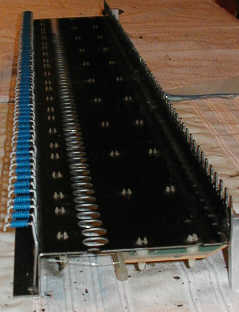
is the picture you'll see when it's been removed: 2. DisassemblySo... now I had this pretty keyboard in front of me: First, the key caps (or how's that called for musical keyboards?) have to be
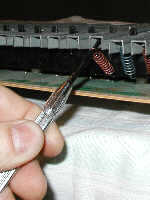
removed. Then the springs and the seesaws have to be removed.
The documentation is quite good in this respect. After that, the keyboard looks
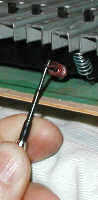
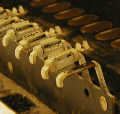
like that: ... and on the front side you can see the problematic rubber parts. Here
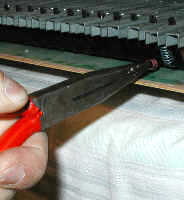
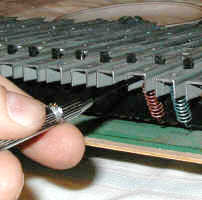
they're again, in greater detail: 3. Apply Upgrade KitSooo... these rubber parts have to be removed and replaced with parts of the Keyboard Upgrade now. This means quite a lot of work and it took me quite some time, since I'm not exactly skilled when it comes to manual things... After the work is done, the keyboard looks like that: 4. ReassemblyThis was the part where I always failed when I was a child :-) ... but that was long ago. Reassembly is quite easy; what's a bit problematic is to put the springs on the hinges. I've done that using pliers and a tiny screwdriver; first, I placed the spring with the pliers, then, while stretching the spring a bit so that it couldn't fall off, put the screwdriver in the pliers' place and seated the spring, like that:
The rest is quite easy - turn around the keyboard and reseat the contact
spring holders, screw on the key caps, install the keyboard. And now look at the
"New Wave": Whew... the whole task took me about 9 hours. I guess that Joe Average home mechanic can do it in half the time, I did it with extreme care and slow, since I don't have much practice in such things. The second upgrade kit went better, I did it in 7 hours (2 of these were just for cleaning & polishing the key caps). Well, you can do it faster, too... I know at least one PPG owner personally who managed to do it in 2 1/2 hours. 5. PlayDoes it pay off? You bet... much better now. The keyboard feels at least as good as it did 15 years ago, if not better. Nothing sticks, everything works as you'd expect it to. Conclusion: I can only recommend the Keyboard Upgrade - with the little reservation that it's not a simple plug-and-play operation, it needs a lot of manual work (but PPG owners should be accustomed to that :-) Links:
AlternativesDuring some research on the Internet I came across an alternative solution, created by the American company Archive Sound. In contrast to the Keyboard Upgrade Kit presented here it consists of a set of replacement rubber bushings. This kit costs about 25% more and has the big advantage of a reduced work time and slightly better centering of the keys, but one disadvantage has to be mentioned - after some years, the rubber parts loose their form again; this solution isn't nearly as durable. A similar solution has now appeared at High Spies. This variant should be cheaper than the Archive Sound Kit.
|
 and
and

 ... colorful, isn't it?... and the metal seesaws have changed, too, since the
attenuators are now located there. During this work, I've straightened all the metal
tongues as good as possible, since a lot of them were twisted, which contributed
to the "wavy" appearance.
... colorful, isn't it?... and the metal seesaws have changed, too, since the
attenuators are now located there. During this work, I've straightened all the metal
tongues as good as possible, since a lot of them were twisted, which contributed
to the "wavy" appearance.